Project Dream’s new update brought a few new ways to generate and retouch your images so we thought it would be a good idea to give you some advice and ideas to on how to write prompts in Project Dream and a general tutorial to those new into using it or AI in general.
Image generation and prompt writing
First thing you’ll see when writing your prompt is that you have text box and an optional negative prompt box. The first one is used for positive prompts and the second one is for your negative prompts. In short this means that you should write what you’d like to see in the end result at the top and optionally follow it up with things that shouldn’t be included in the image.
Prompt structure works similarly between the two options but influence the AI in a different direction.
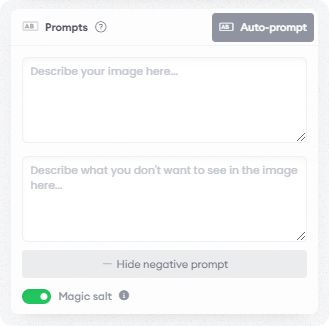
A good prompt is a detailed description of how the end result should look, what to contain, how the subject is portrayed and adding extra details if needed. You should use descriptive words or short sentences divided with commas while trying to be as specific as you can. It’s important that you use descriptions and not commands like create an image of… or make this wall darker.
To get used to how an AI interprets your prompts it’s a good idea to use the Auto-Prompt button to get a description on a picture you like or one that’s style or subject you’d like to use in your project. The other way is to experiment with building your prompts with small changes and additions first to learn.
Here is a short example of generally the same prompt but written differently.
Prompt (bad example): Generate an image with high-rise apartments, put some people on the streets, make it look like it was photographed while the sun is setting
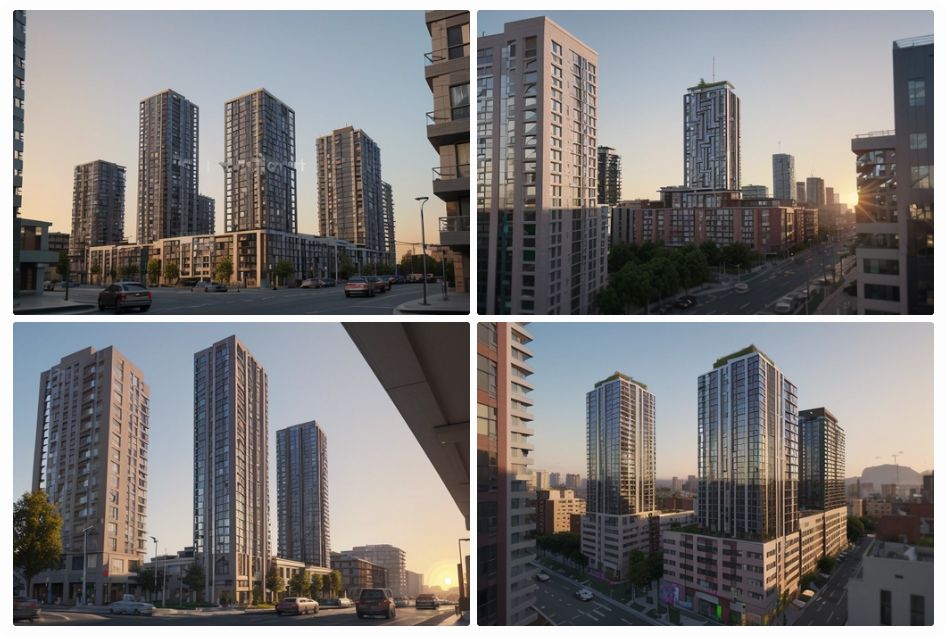
Prompt (good example): high-rise apartments, picture taken from street level, people walking on the sidewalk, cars going on the roads, photorealistic, realistic, sunset, busy city
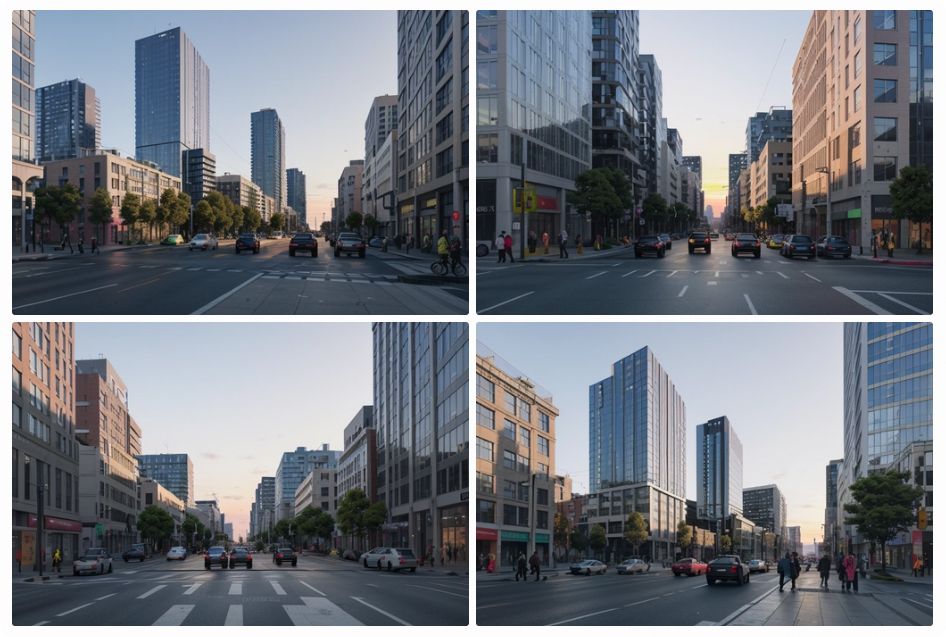
As you can see using instructional language generates a picture as it can still pick up on key words that it understands but using descriptions you can have more control and results in generally better images.
You can also use weighted parameters in Project Dream by putting the description in brackets followed by a colon and with a number at the end. For example (sun in the background:1.8),(clouds:0.6). The base value of every separated descriptor is 1.0 that means you can make certain descriptions more pronounced by putting a high number in the brackets or lower it by a lower number.
Now let’s try something very basic. This should give the AI a very broad subject and let it do whatever it wants with it.
Prompt: Two-story house
Two-story house without Magic Salt
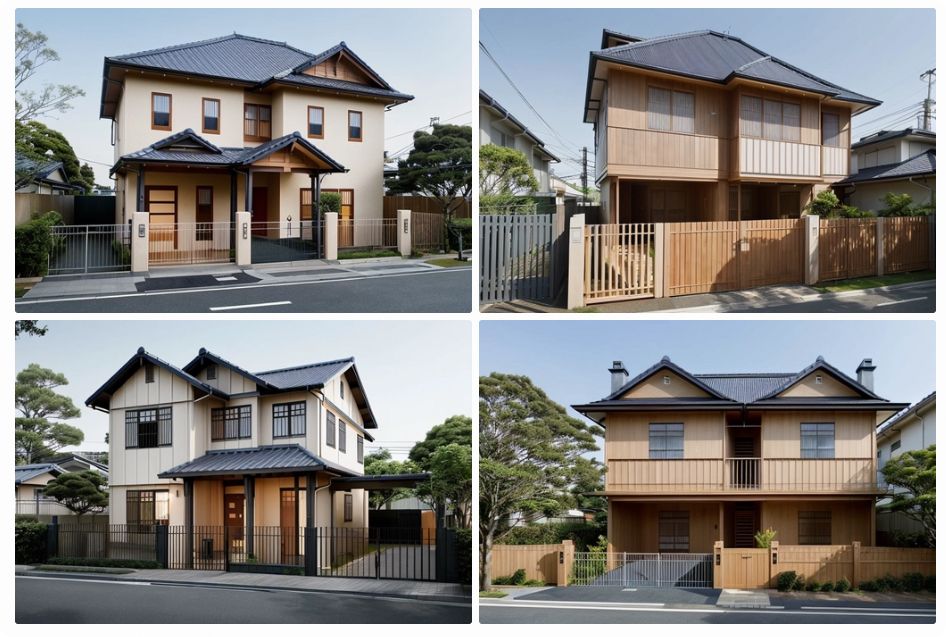
Two-story house with Magic Salt
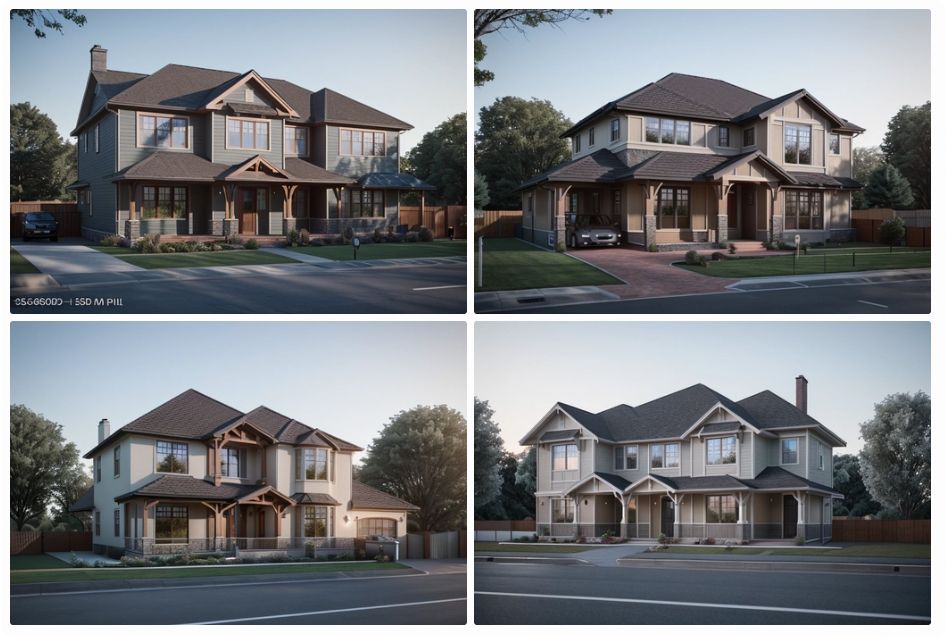
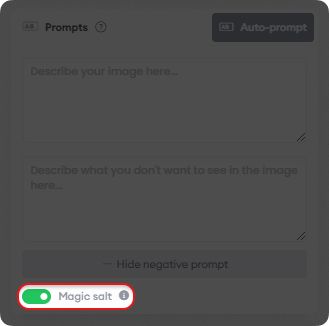
As you can see it gives us an image that generally resembles a house but it has some issues and it’s very basic. You can also see the Magic Salt option being turned on or off. Magic Salt is our addition to your generation process. It contains some extra prompts that we add to your prompts before generation that the specific AI we use responds to well.
From here you might have a picture that resembles what you want to see. If that happens you could just click Create Variations on that picture to put it back into the Input Image field and run Auto-prompt on it to get a more detailed prompt that you can customize to your liking.
For now let’s keep on building the prompt we started using.
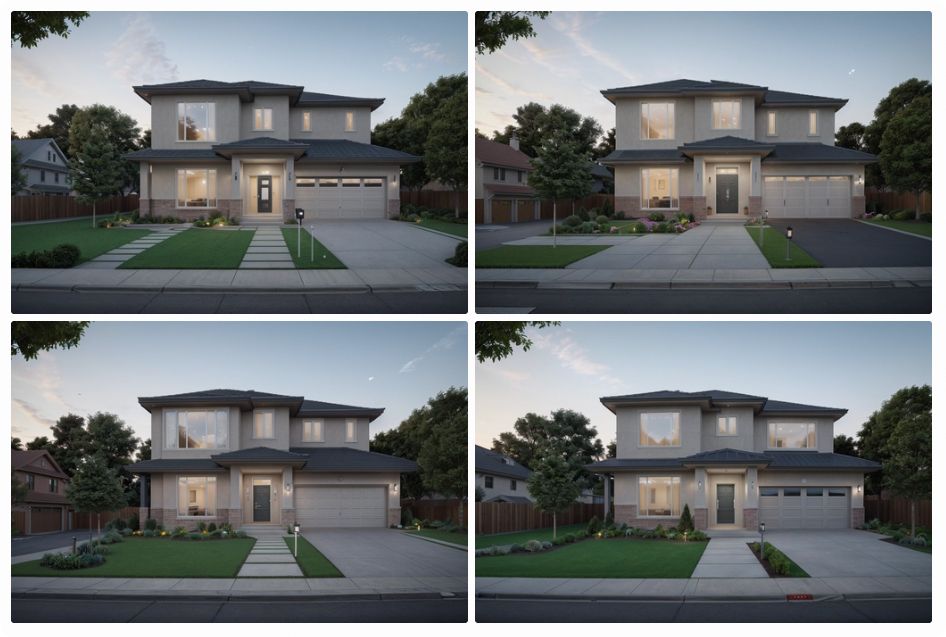
Positive Prompt: Modern two-story house with one entrance and a porch, garage at the side of the house, clouds in the background, sidewalk shown at the bottom, green lawn before the house, dawn
Negative Prompt: cars, people
Without Magic Salt
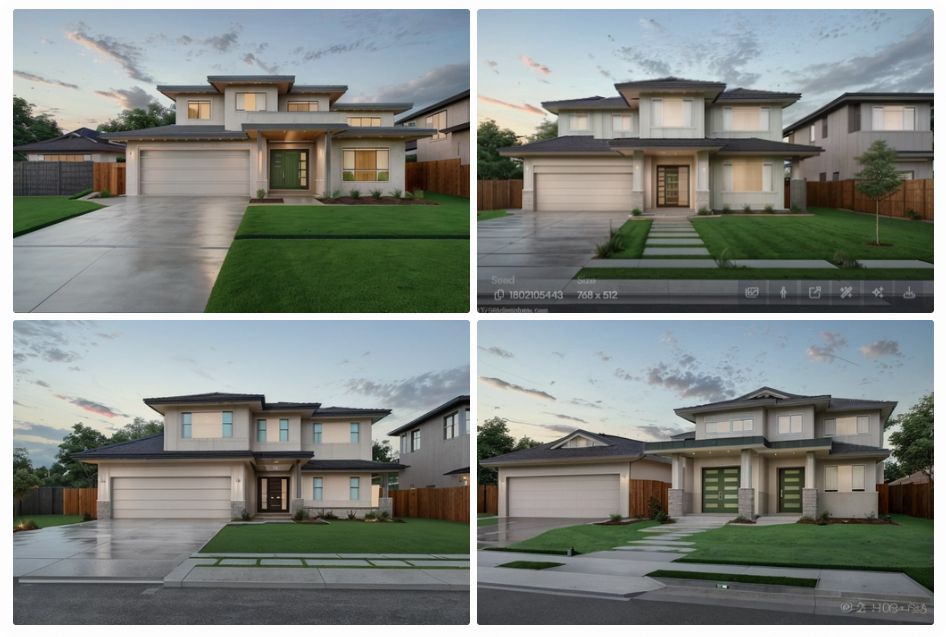
With Magic Salt
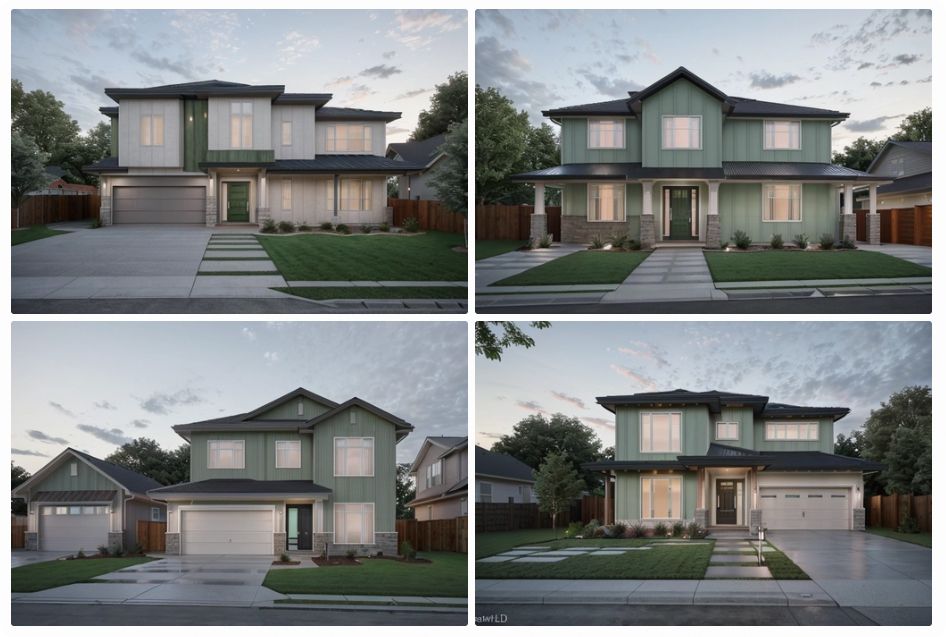
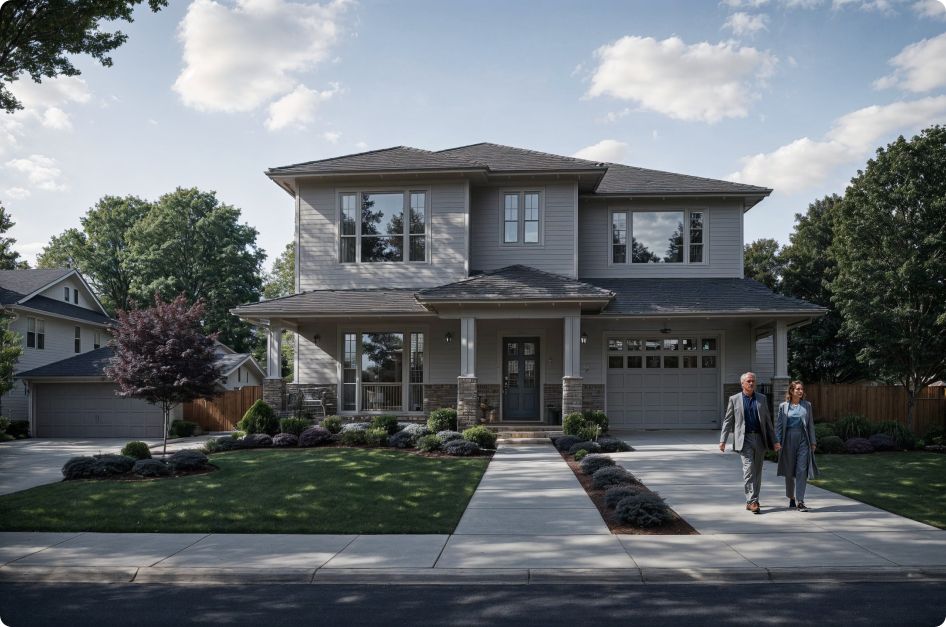
Now we have a few images that depict what we described and we can move onto prompting specific places. For example I’ll grab one of the pictures and generate an Auto-Prompt with low image strength (10%) and high creativity (80%) to get a few more variations that generally look better.
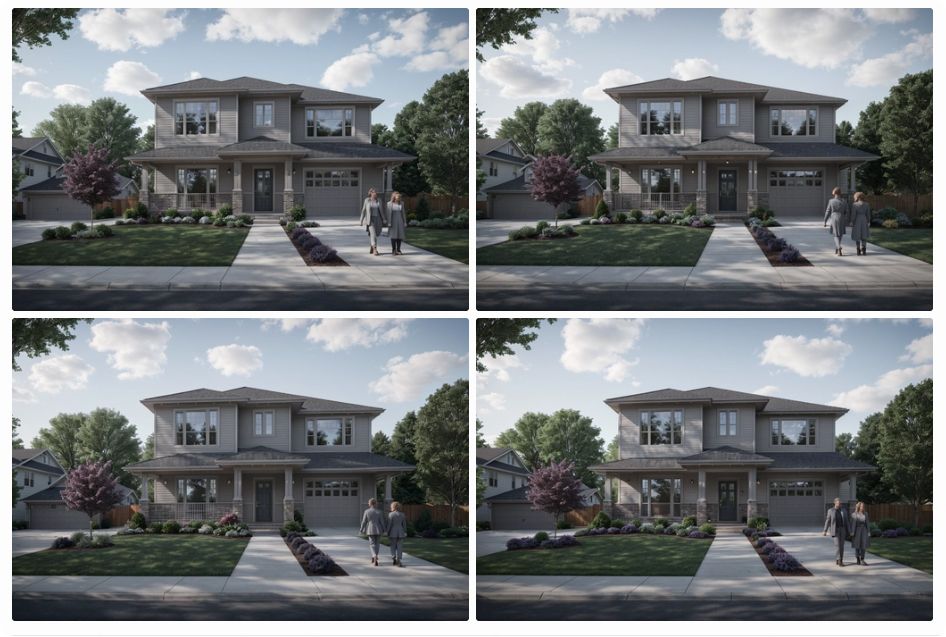
For the next step I masked out a general place on one of the pictures to add some people. With the prompt 1 woman and 1 man walking on the sidewalk front of the garage. After that I got a picture that had the people but they were a bit out of place so I did the last step again to generate a variant that put things back together as one whole picture.
For an alternate solution you could download the image, add people to it with an image editor and generate variant on that to have more control on where and how people appear on the image.
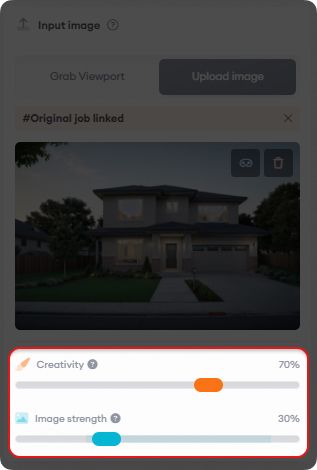
When using Image generation to create an image from simple 3D objects, sketches or drafts, the rules stay the same. Describe the image you want as an end result and let the AI take context clues from your input image.
Depending on how detailed your input image is you should try moving the Creativity and Image Strength slider around.
Creativity slider controls how much the AI will change your image. This could result in more details or it could heavily alter your input image on high percentages.
The Image Strength slider decides how much the AI will take your input image into consideration regarding composition. The higher the percentage the more closely it will follow your input image’s composition. This means that even with strong prompts describing a motorcycle in place of a car it will stay a car or at least in the shape of a car if your Image Strength is high.
Creative Upscaler
Now that we have a picture we like we can work on making it better. Creative Upscaler is meant to be used to upscale your image while adding small details to places where possible. Keeping that in mind you can try forcing changes in the image by describing the original image or using Auto-Prompt to generate a baseline and after that work in the changes that you want to see into the description.
If you’re just looking for an upscaled version of your original image with some extra detail you should try leaving the prompts empty and let Magic Salt do it’s job.
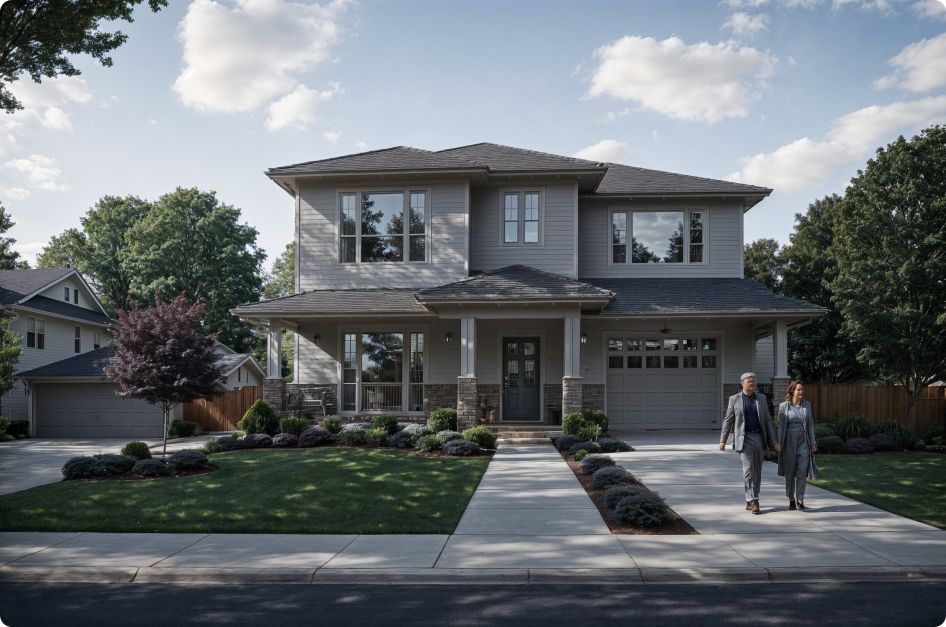
On this example I used the Auto-Prompt to generate a prompt for me and made some small changes to it that it didn’t describe the way I wanted it to look.
Character Enhancer
This module is there for you if you need to fix people on your image like in this example. Here the AI will pick out the recognizable people on the image and replace them with similar people. At first we suggest not prompting these jobs. This is because you can only use very general descriptions as the same prompt will be applied to every person individually. This means you shouldn’t use prompts that describe the whole picture like, people talking in the background while kids play in the foreground. Prompts in Character Enchancer can be used to set a general mood like smiling, crying, young and such while keeping in mind that this will be applied to everyone without masking. Also keep in mind that general prompting rules still apply. That means you have to use descriptions instead of commands.
As an example let’s use this image.
Now let’s see what happens when we use commands and descriptions.
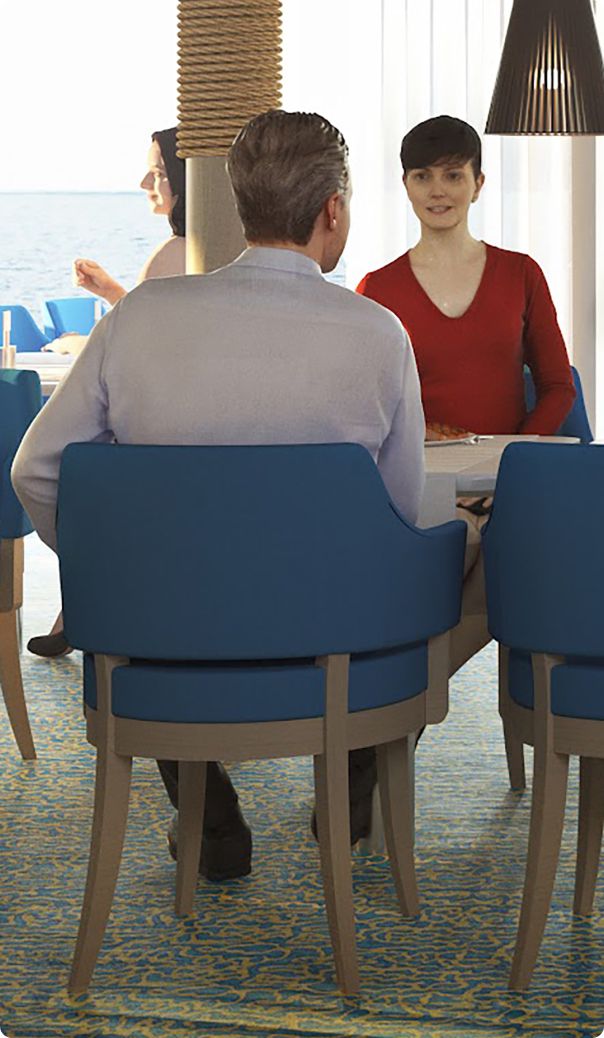
Prompt: make the woman on the picture blonde
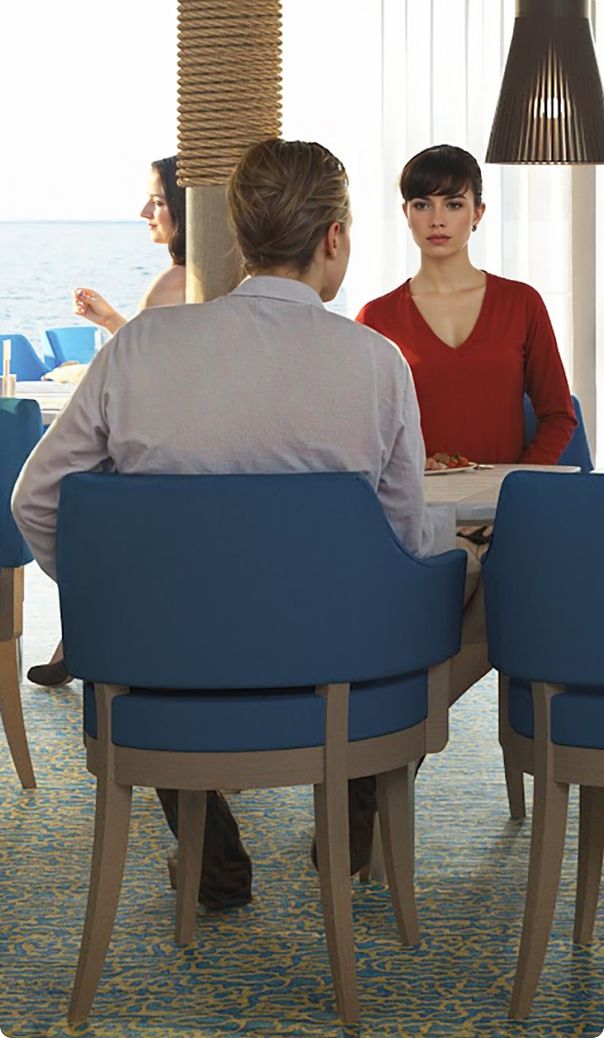
Prompt: blonde, woman, light hair,
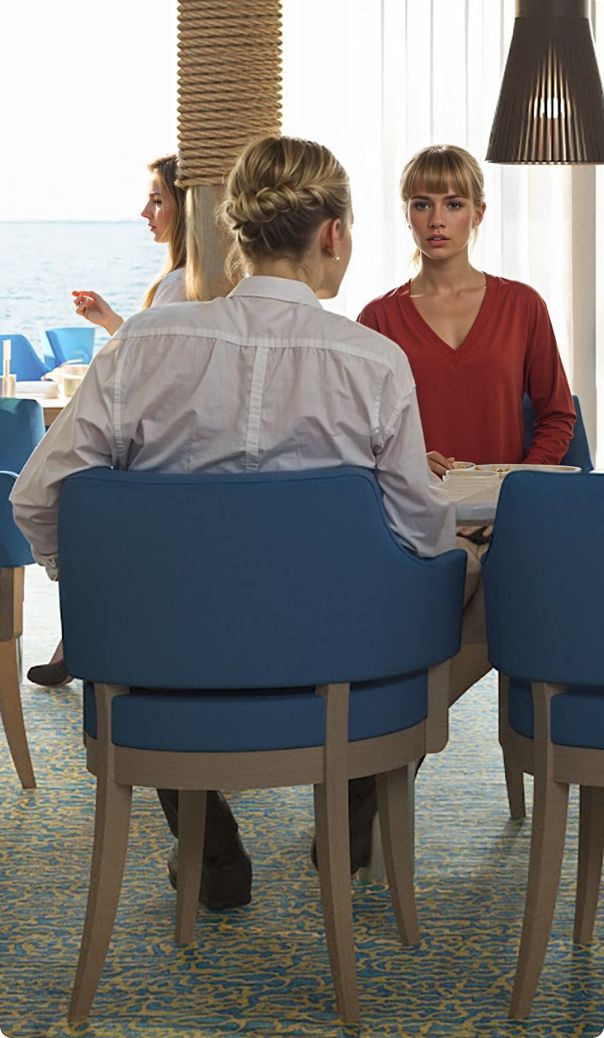
As you can see using descriptive prompts resulted in an image that ended up the way I wanted it to. It also applied to everyone on the picture individually.
Moving onto replacing someone specific or groups by masking. If you want to go one-by-one you could mask out a person to prompt them individually. For this you should make sure to include the whole person in the mask while trying to separate them for the others. After creating a mask describe the person you wish to see like before.
Let’s start from a picture that needs some Character enhancement.
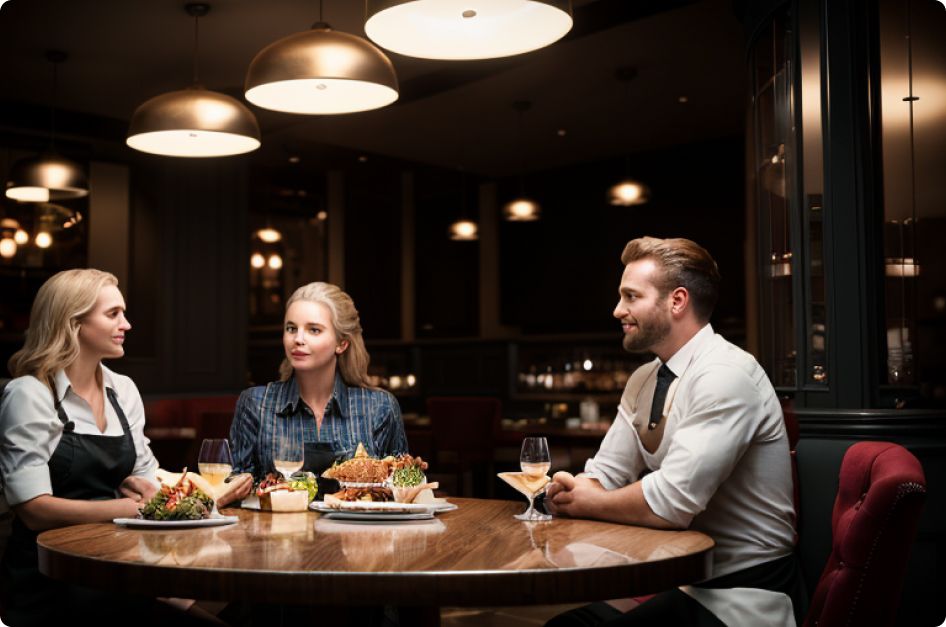
Prompt: smiling man, No mask used, so it will be applied to everyone on the picture.
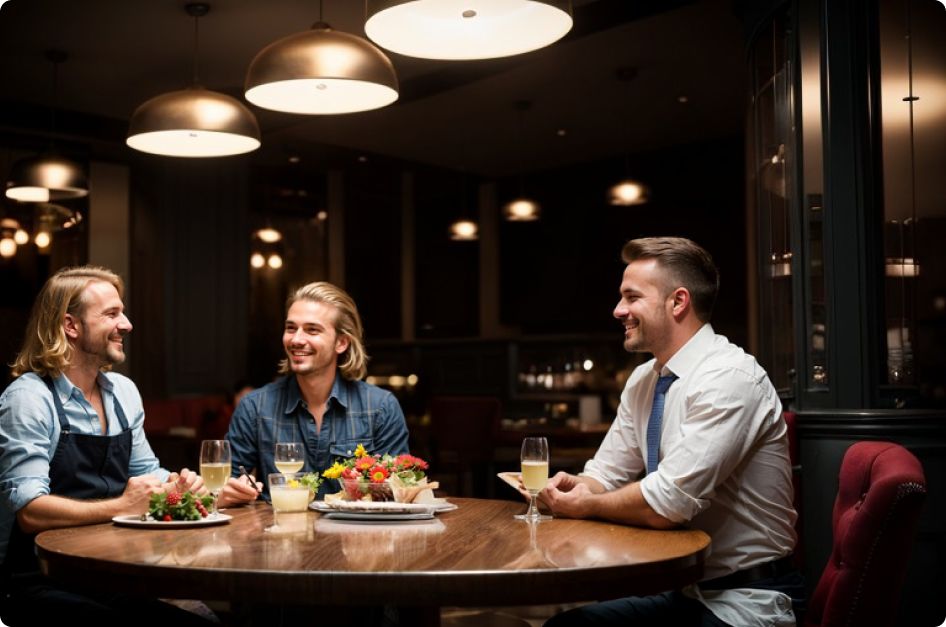
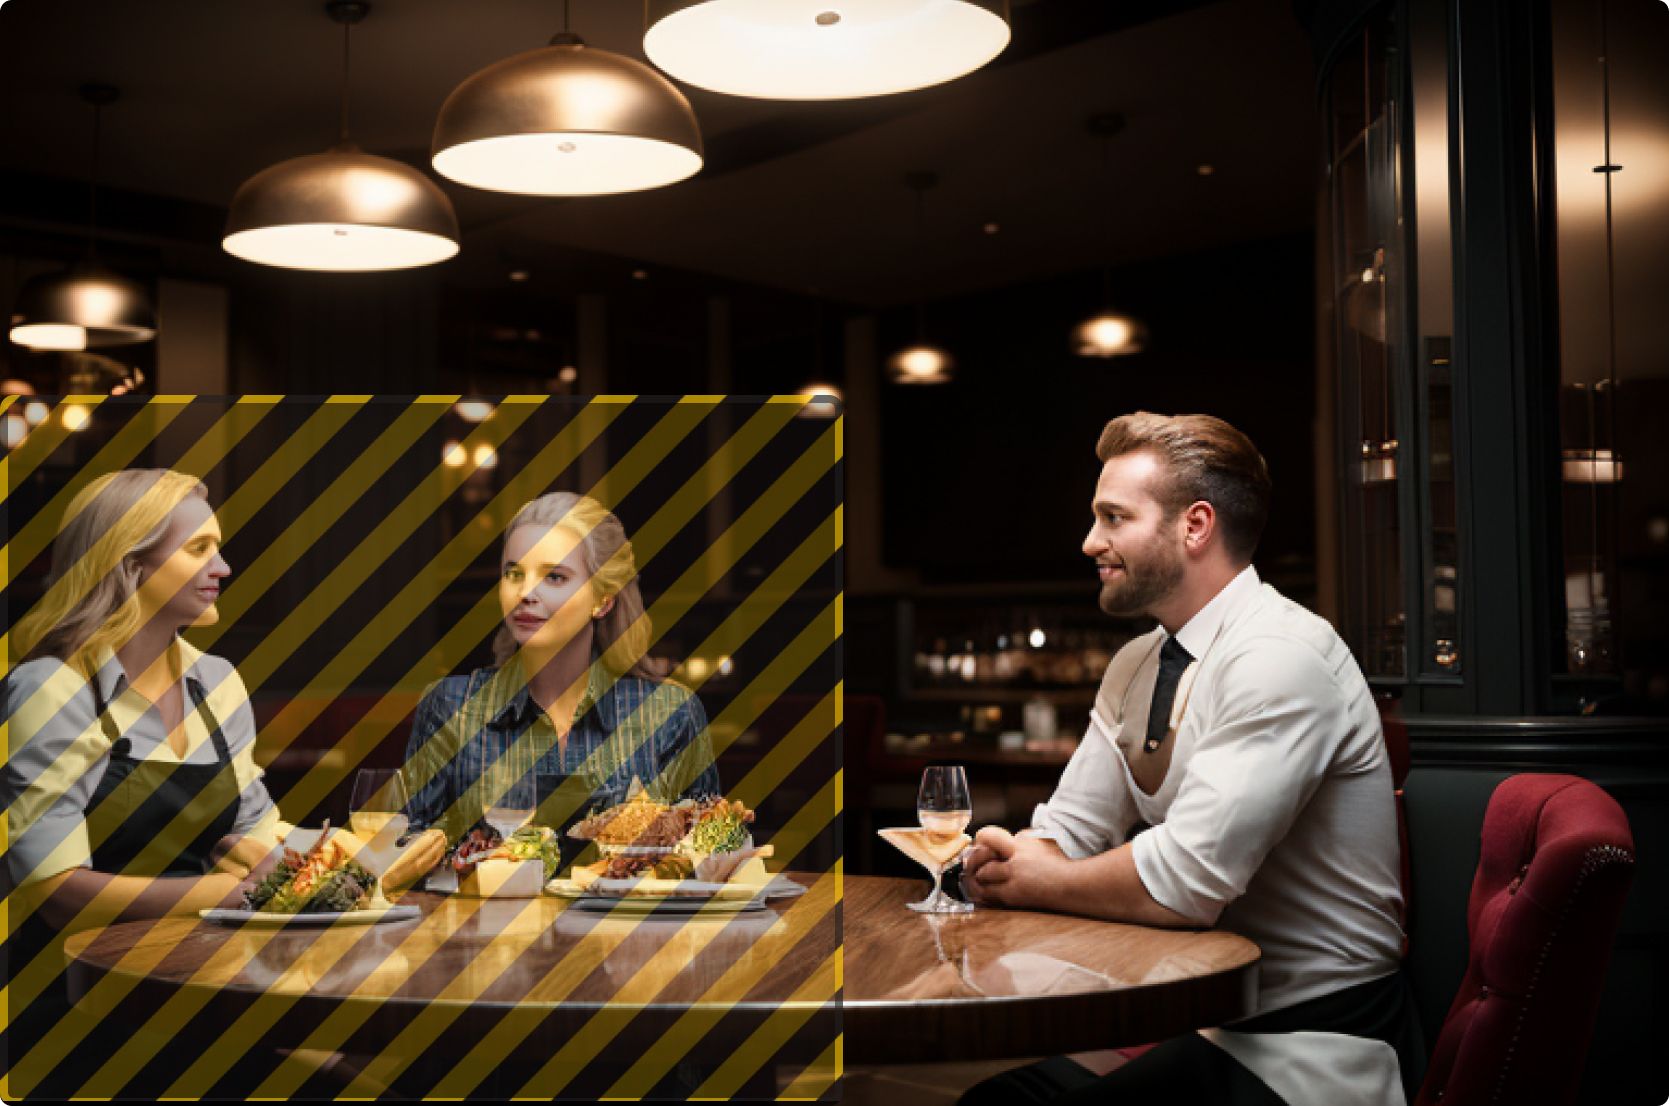
I’ve masked out the two woman on the left while leaving the man on the right out like this:
I ran the generation with the prompt blonde woman, smiling. After that I used the result for character enhancer, masked out the man on the right and prompted Dark haired man, brooding, just to see an other emotion.
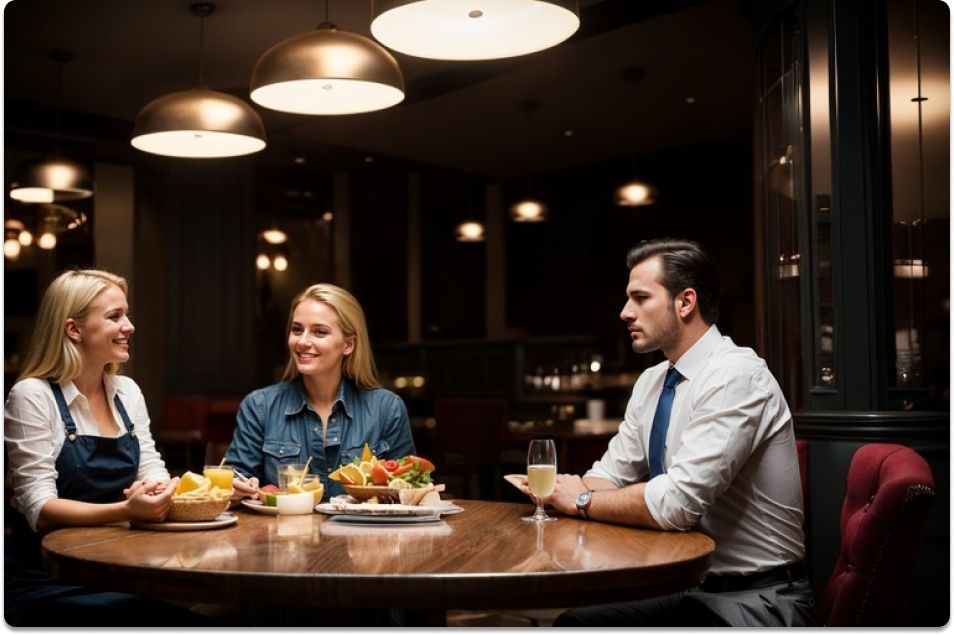
Going back to the original example I didn’t use any prompts and got this image.
Style Transfer / Reference mood
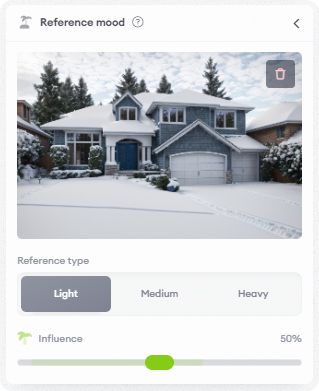
When using Style Transfer or adding a reference image to Reference Mood in Image Generation you can use all previously mentioned ways of prompting by generating a prompt or writing one yourself at first. After describing your input image you should start removing or changing descriptions that contradict the style or mood you wish to add to your image.
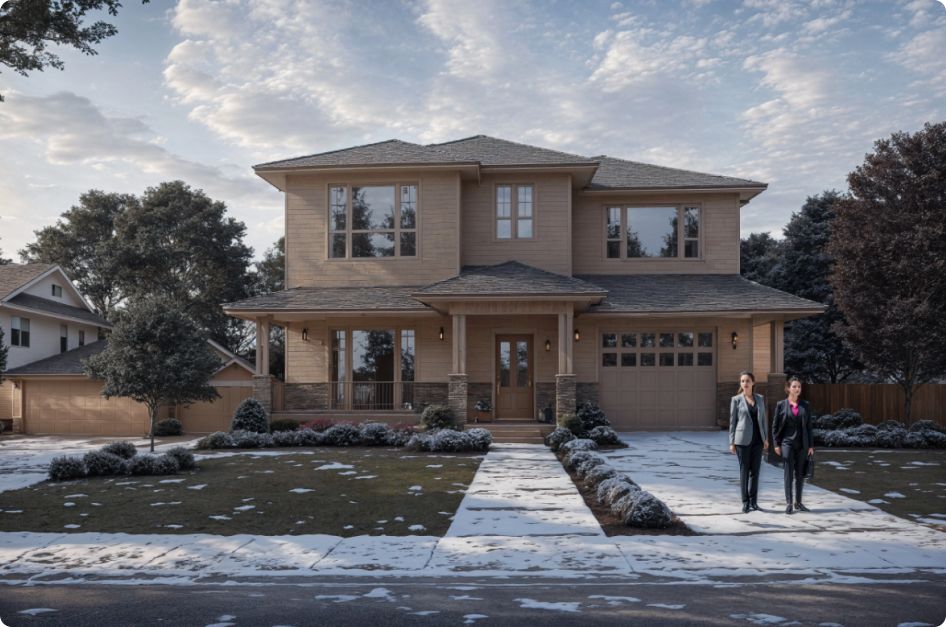
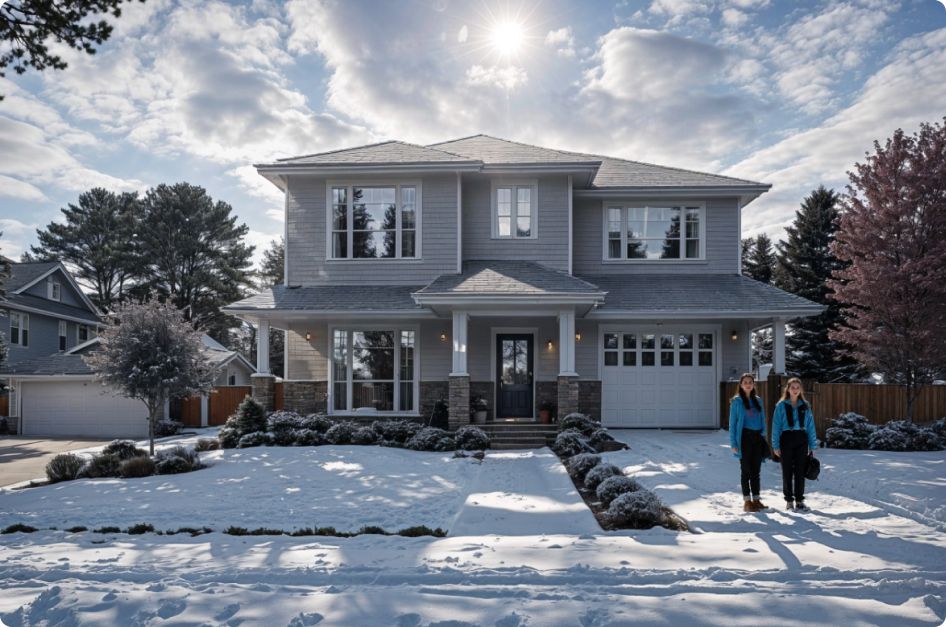
For example I used our previously created images, added an image that depicts a similar house but during winter with lots of snow. After that I reused my old prompts and started taking out descriptions like sunny day, clear skies, great weather, lush green lawn and such. After removing the contradicting describers I started adding more and more mentions of snow, covered in snow, winter, cold and other ways of describing the end result I was hoping for.
In the first example I used light as a reference type and added a few mentions of snow and winter.
For the second try I used a medium reference with stronger descriptions like covered in snow and completely removed mentions of visible lawn.
We hope this small tutorial helped you with getting to know Project Dream, gave you some ideas for your projects and showed you how to use the various tools inside Project Dream. We’d also like to point you towards our Documentation to see a more detailed description of individual sliders, settings and options.
At last don’t forget to join us in our Discord Channel, and let us know how you are using Project Dream or give us feedback on how we can improve it!
