Overview
When it comes to working on an interior image, creating a balanced composition is one of the most important goals one should focus on. This is just as crucial as it is considering an exterior view. Lucky for us, we have a slightly easier job because we don’t need to concentrate on as many elements as on an exterior image, such as street details, trees, cars, and people. Still, we need to keep in mind that all the models in the view need to be in harmony with each other, down to the smallest detail. There are no exceptions - if a chandelier or a sofa is wrongly placed and disrupts the composition, we need to fix it.
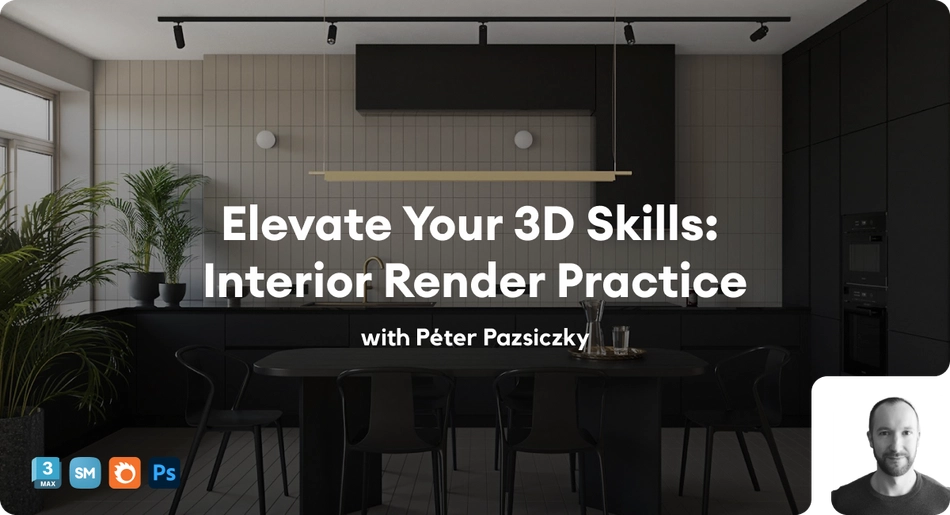
In this article, Peter Pazsiczky aka Pazsi, Senior 3D artist and mentor at Brick Visual will walk you through the process of creating a modern and clean kitchen interior image that begs to be featured in any design magazine.
The process
The steps you will see are based on the tried and tested workflow that I use on a daily base on commercial projects. These exercises are excellent for analyzing photographs and understanding compositions that you can later apply to real-world projects. So let’s get started!
For this project, I used Corona and I chose an interior design from Paliychuk Olga Design. I kept the view from the original photo for one of my images. This is important because we should have a reference image. If this would be a commercial project, I would do the same, trust me.
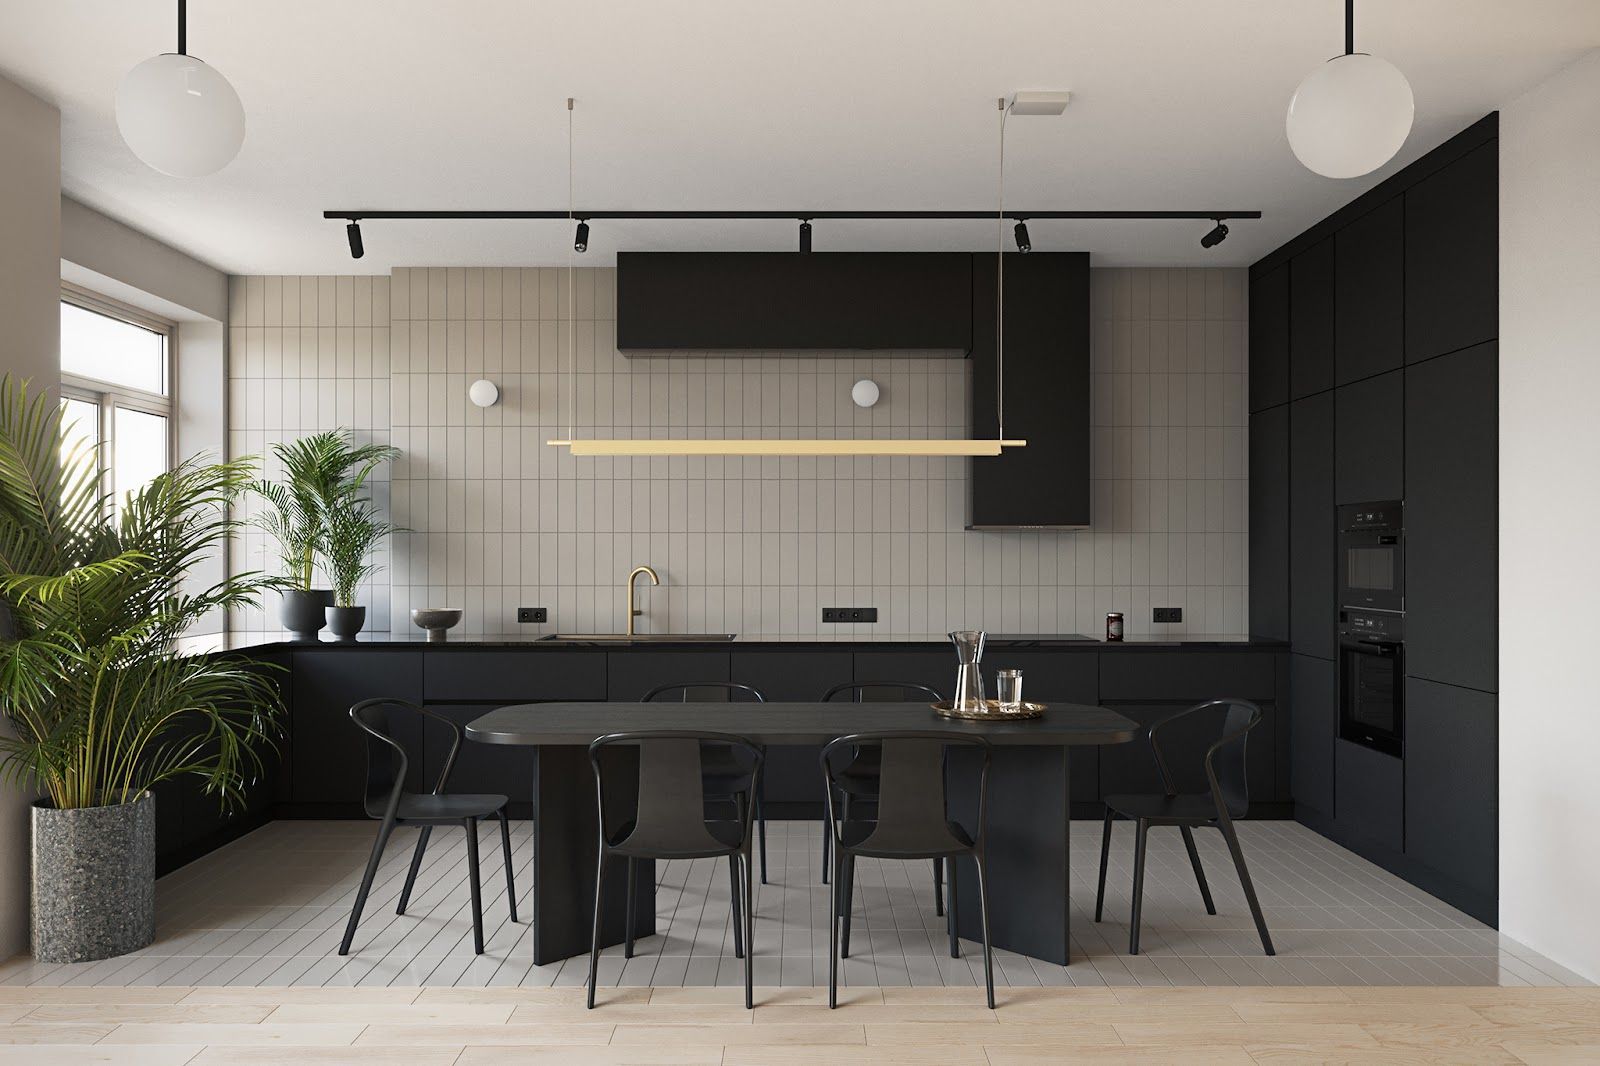
The final outcome of this exercise
First, I modeled the kitchen area according to the 2D plan. Then, I adjusted the image aspect ratio to the original photo, which made it easier to match the perspective. I modeled most of the items for the project, except for some pre-made assets like a chair, plant, plates, and vases.
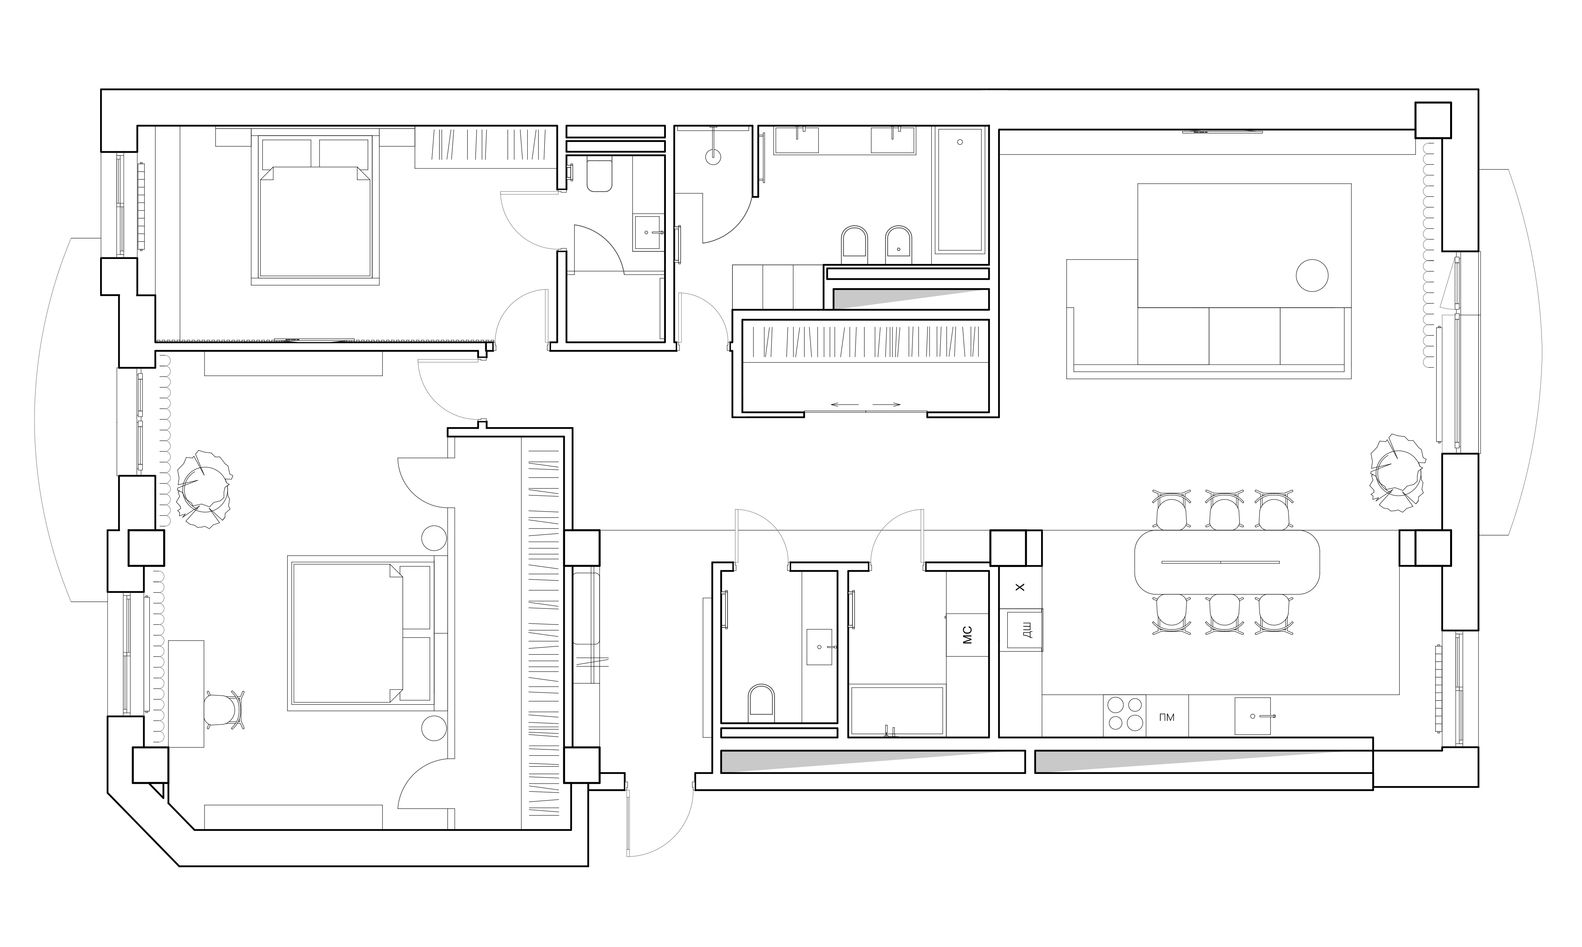
Floorplan of the apartment
As the original photo was already well-composed, I made no changes to it. To achieve the best match, I used the 3ds Max perspective match option. Although only a simple free camera can be created here, once it is ready, the values can be copied to the camera of your choice.
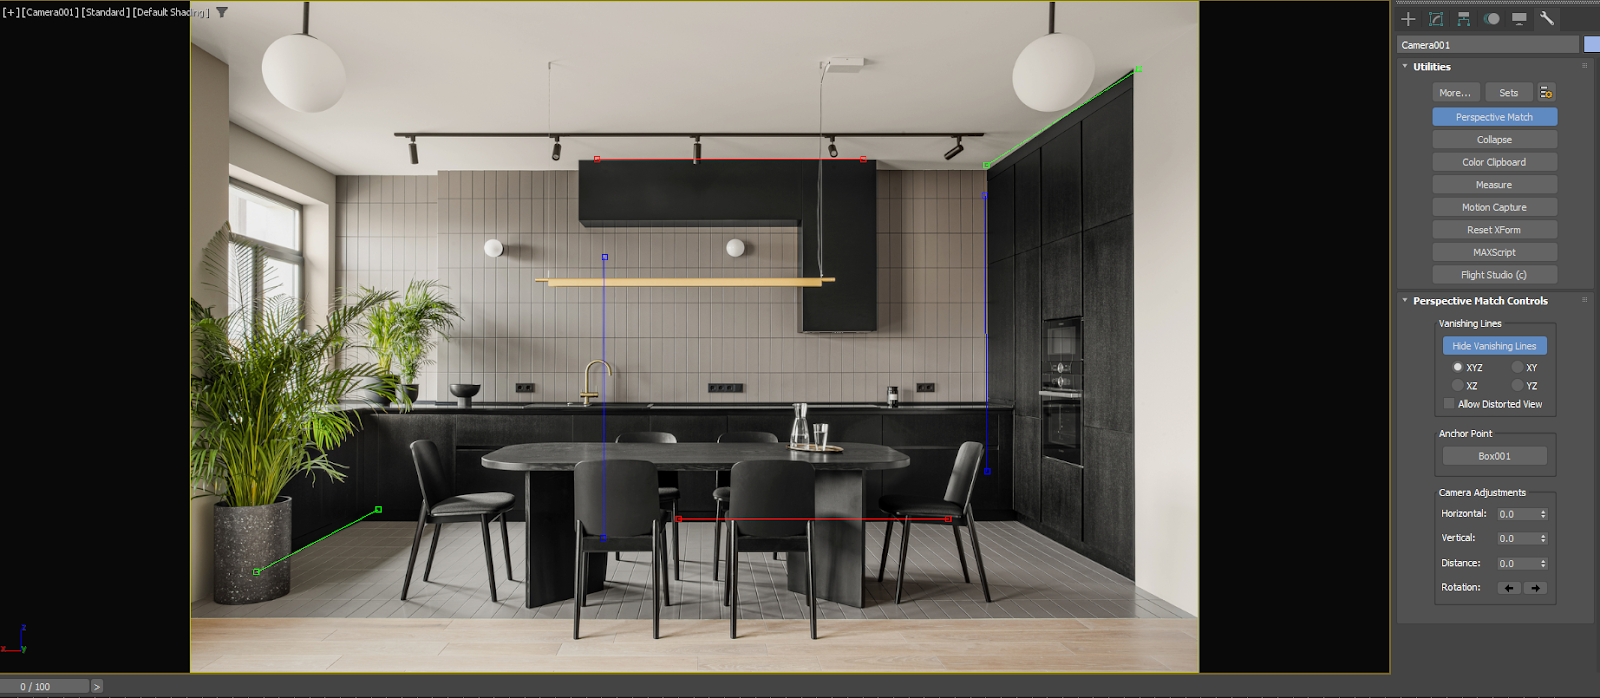
Place the original photo as the viewport background
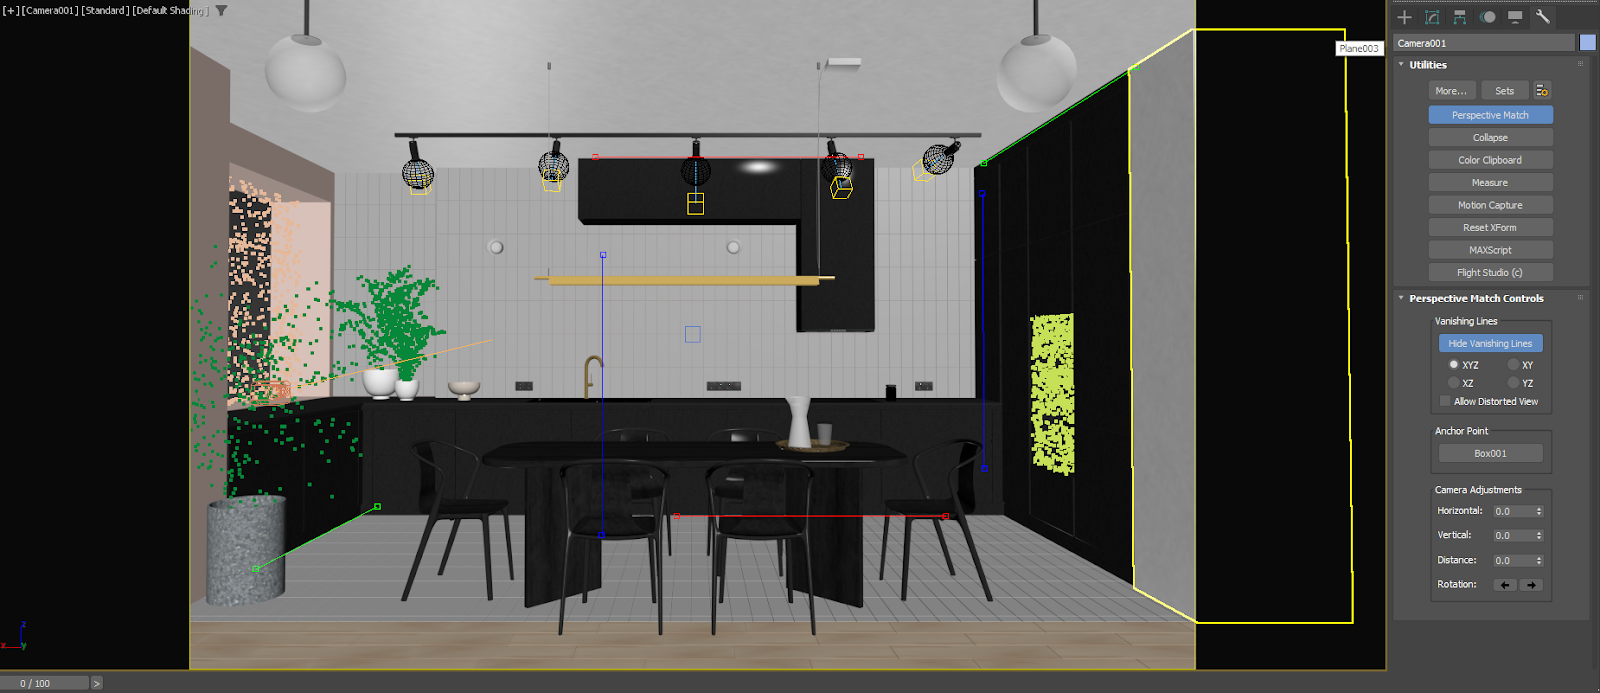
Using the perspective match utility in 3ds Max
Regarding materials, I did not use any complex materials, so I will not discuss them here. Instead, let’s move on to the next key step: lighting.
I prefer natural light instead of turning on interior lights. Luckily, my reference image had a really nice light setup, so I picked an HDRI image from 3DCollective and rotated it until I achieved a similar look.
This process was made easy with my second favourite feature in Scene Manager, the “HDRI Quick Browser.” This feature displays all the HDRI thumbnails in one window, allowing you to quickly pick and apply an image. Now, imagine trying out 15 different HDRI images using the classic method (opening the material editor, browsing the map, etc.). It’s much simpler with the HDRI Browser.
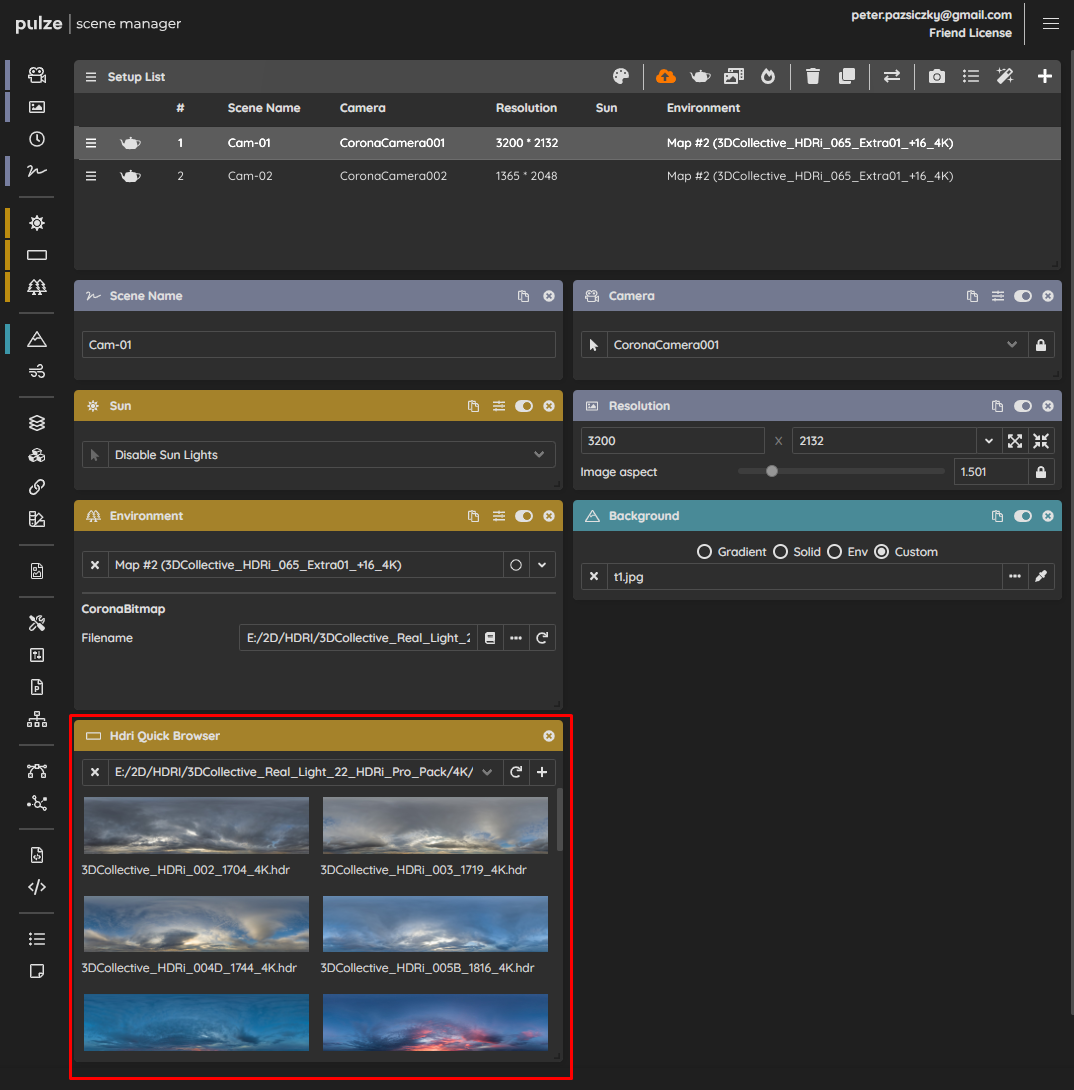
Hdri Quick Browser module in the Scene Manager
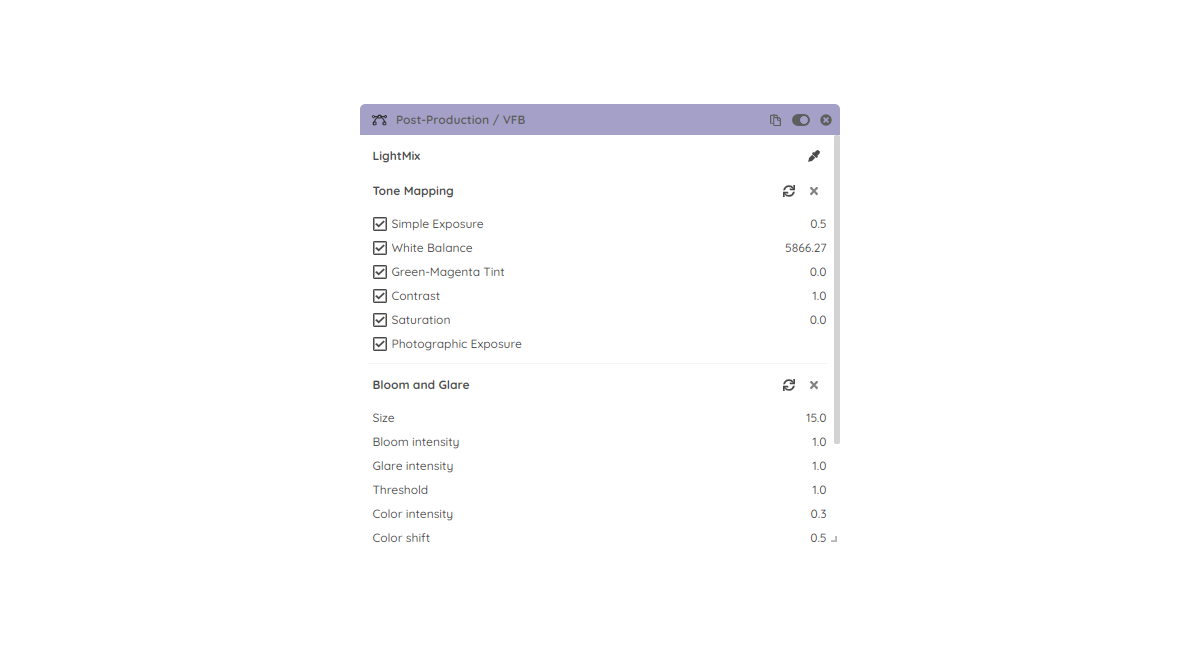
After setting up the lighting in the scene, I typically adjust the colors, contrast, and highlights in the Corona VFB.

Adjusting the Tone Mapping and Bloom options in the Corona VFB
After setting up everything, I tried out some other angles. For this kind of interior project, I believe it is essential to have at least one close-up shot with a shallow depth-of-field effect. This makes the project more engaging and helps achieve a photo-realistic feeling.
For the best depth of field effect, set the corona camera’s F-stop level quite low, just as you would on a real camera. Low F-stop values blur close objects when you focus on the background. Vice versa, if you want to focus on the foreground, you can blur the background with these low values. Simply enable DOF in the camera settings and you’re good to go.
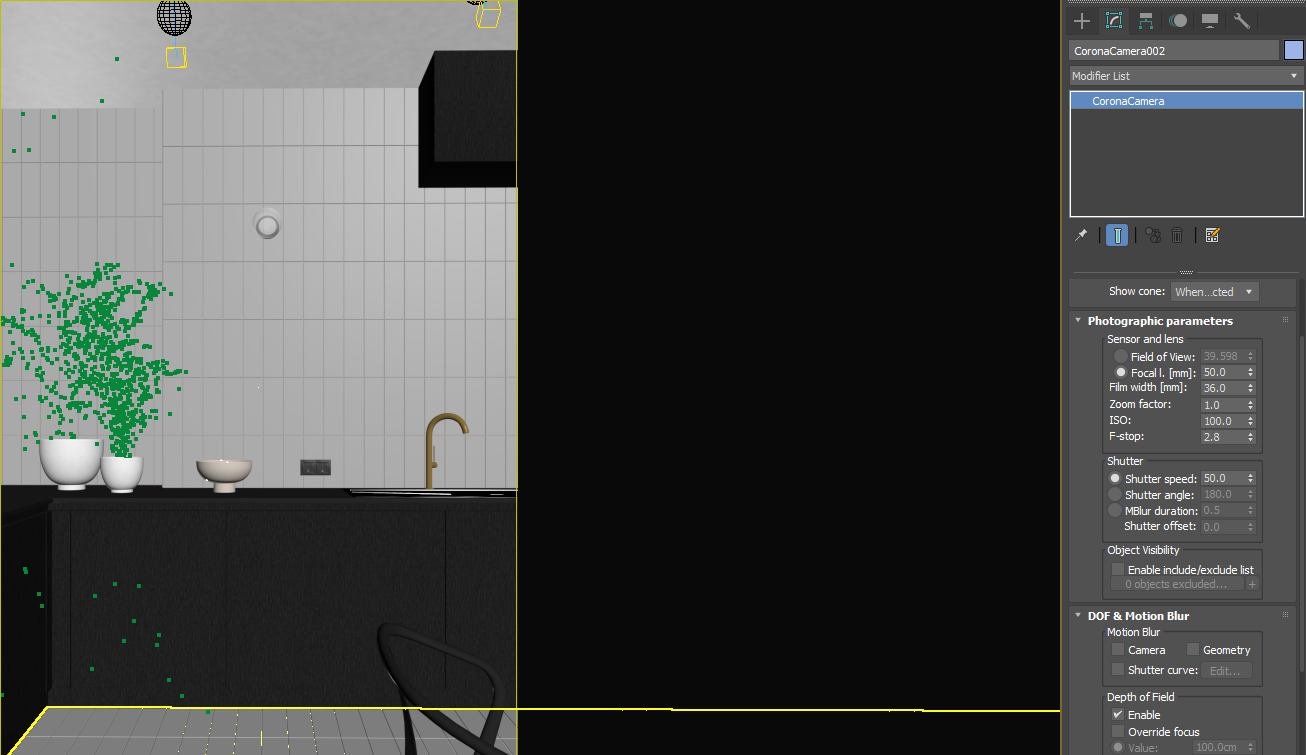
Adjusting the camera settings for the DOF
Every project has the potential to play with interior lights. Although I’m a great fan of natural day scenes, it’s hard to resist the opportunity for a night version, especially when we have the awesome “LightMix” feature.
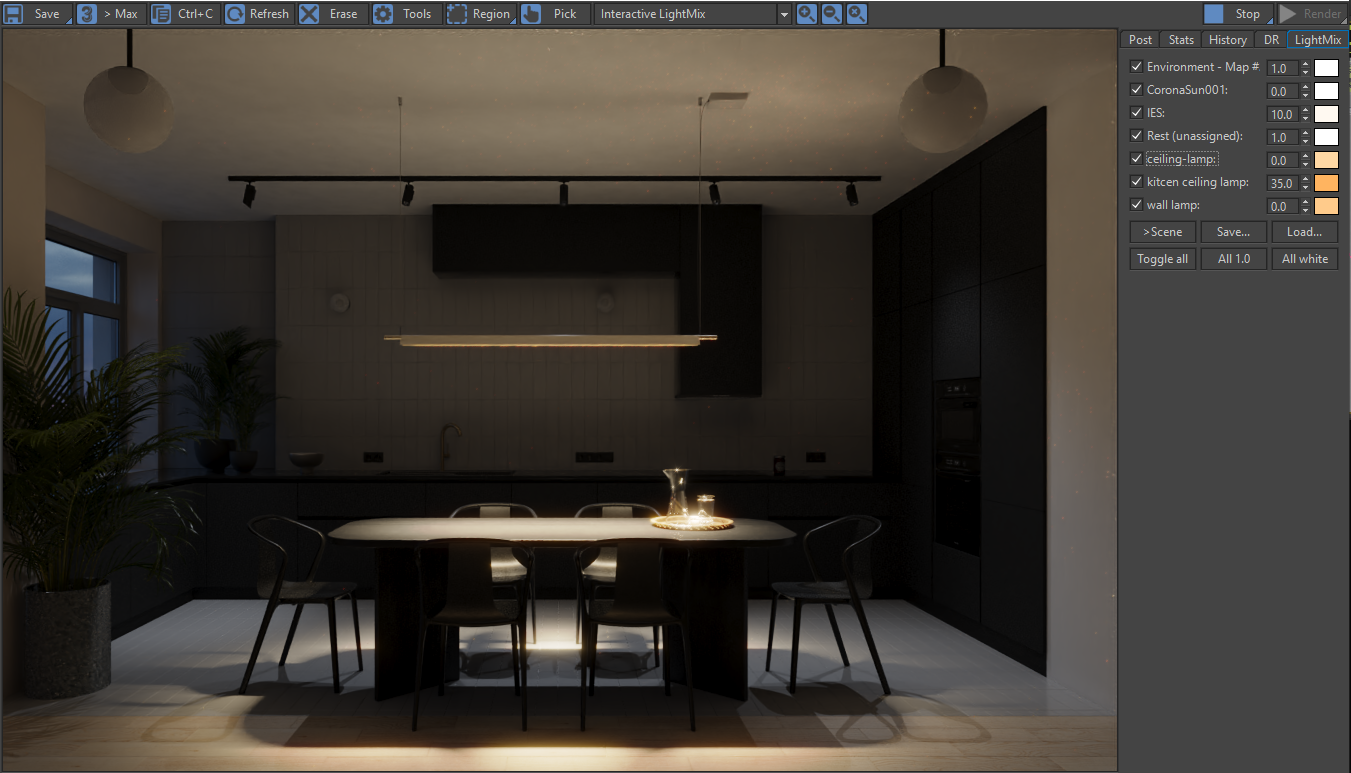
Playing with the LightMix control to get a different lighting
Here, I have quickly changed some parameters to demonstrate the capabilities of LightMix. Assuming that you are familiar with how it works, I will not cover this topic in detail.
If you would like to try out and load back different Tone Mapping and LightMix options quickly I would recommend to try out the Post-Production module in Scene Manager.
The Post-Production / VFB module in Scene Manager
Let’s finish our image with the post-production part. Even if your raw render looks nice as desired, you may find some color tints and bright or dark tones that you need to fix. In the first part of the article, I mentioned that I use reference images. Now, this is the step where they truly come in handy. For best results, we need to match the colors and tones with the photo reference. I picked the main colors from the reference image and started to match the raw render to these colors as closely as possible to achieve a natural color palette.
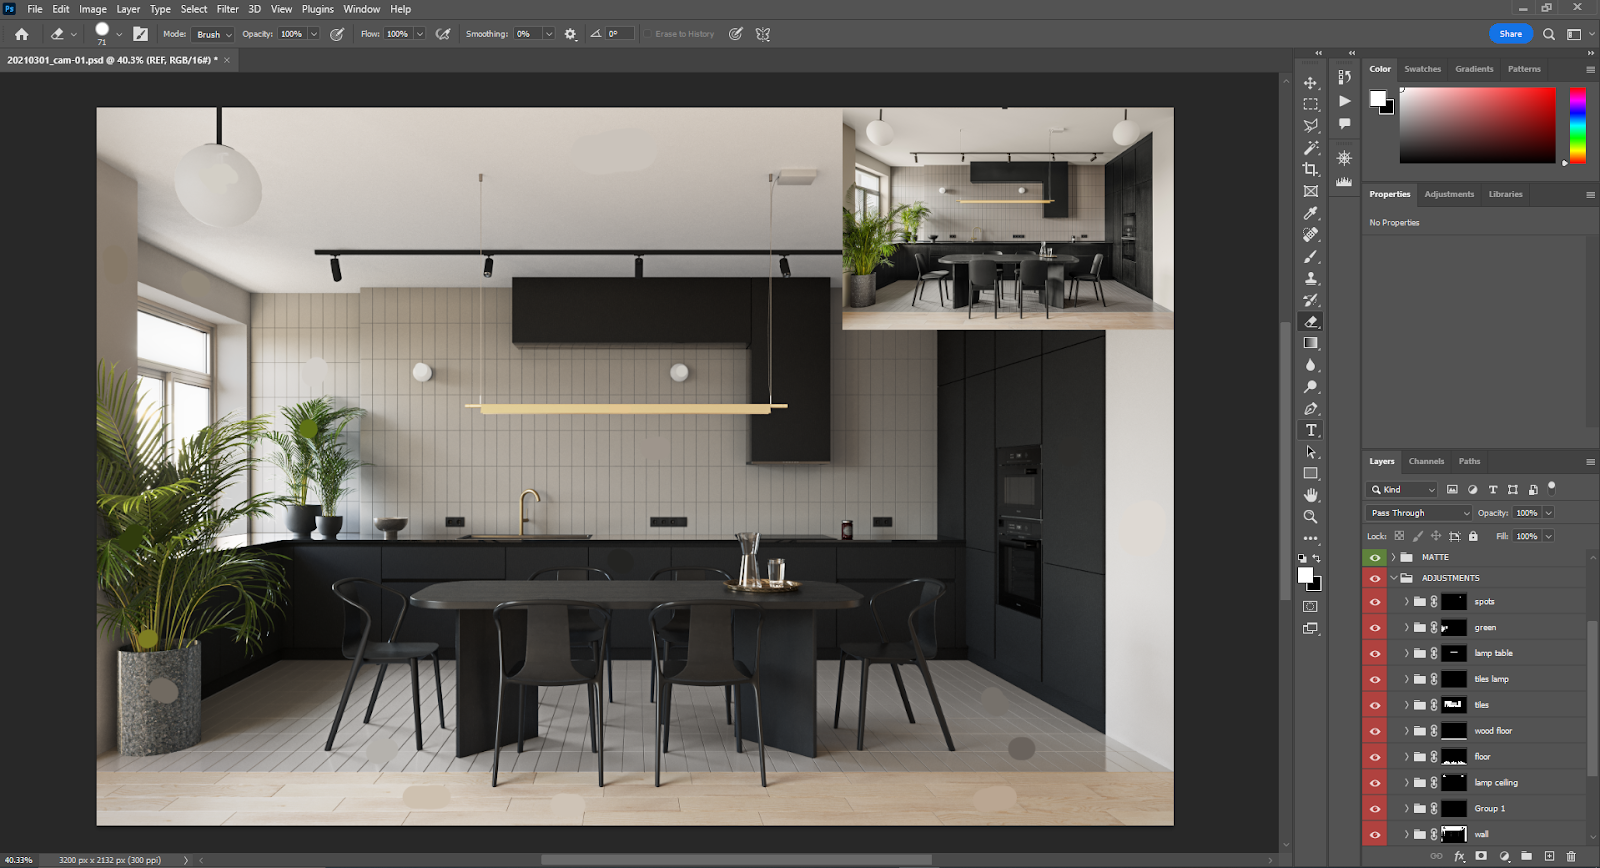
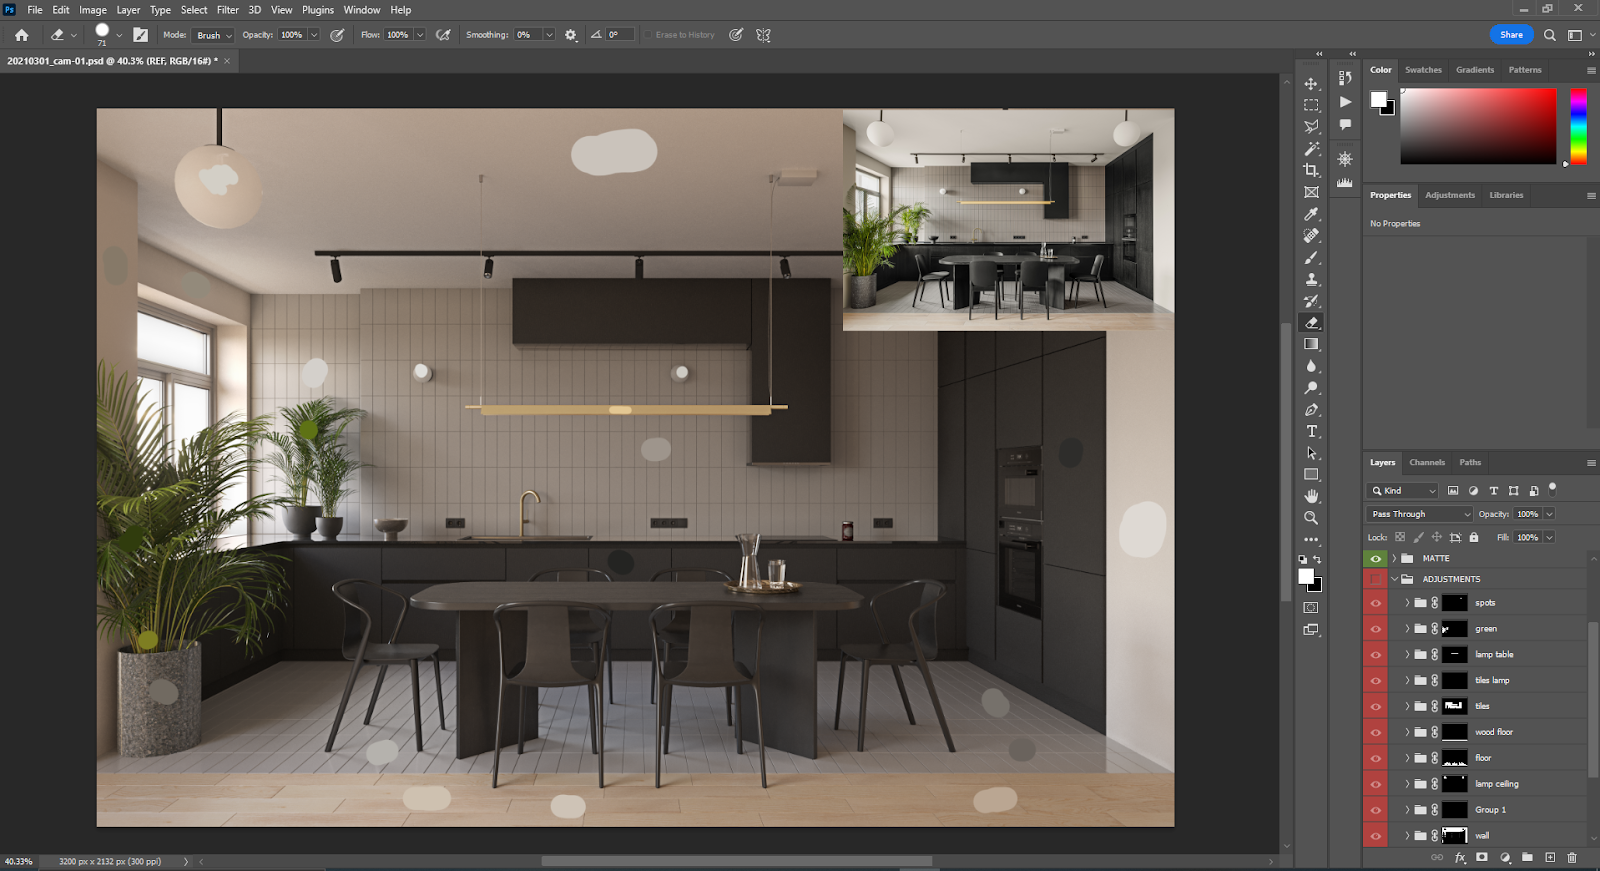
Adding the final touches in Photoshop
This is all about masks, curves, levels, and color corrections. I have recorded a quick video where I show the different adjustments that I used to finalize the image.
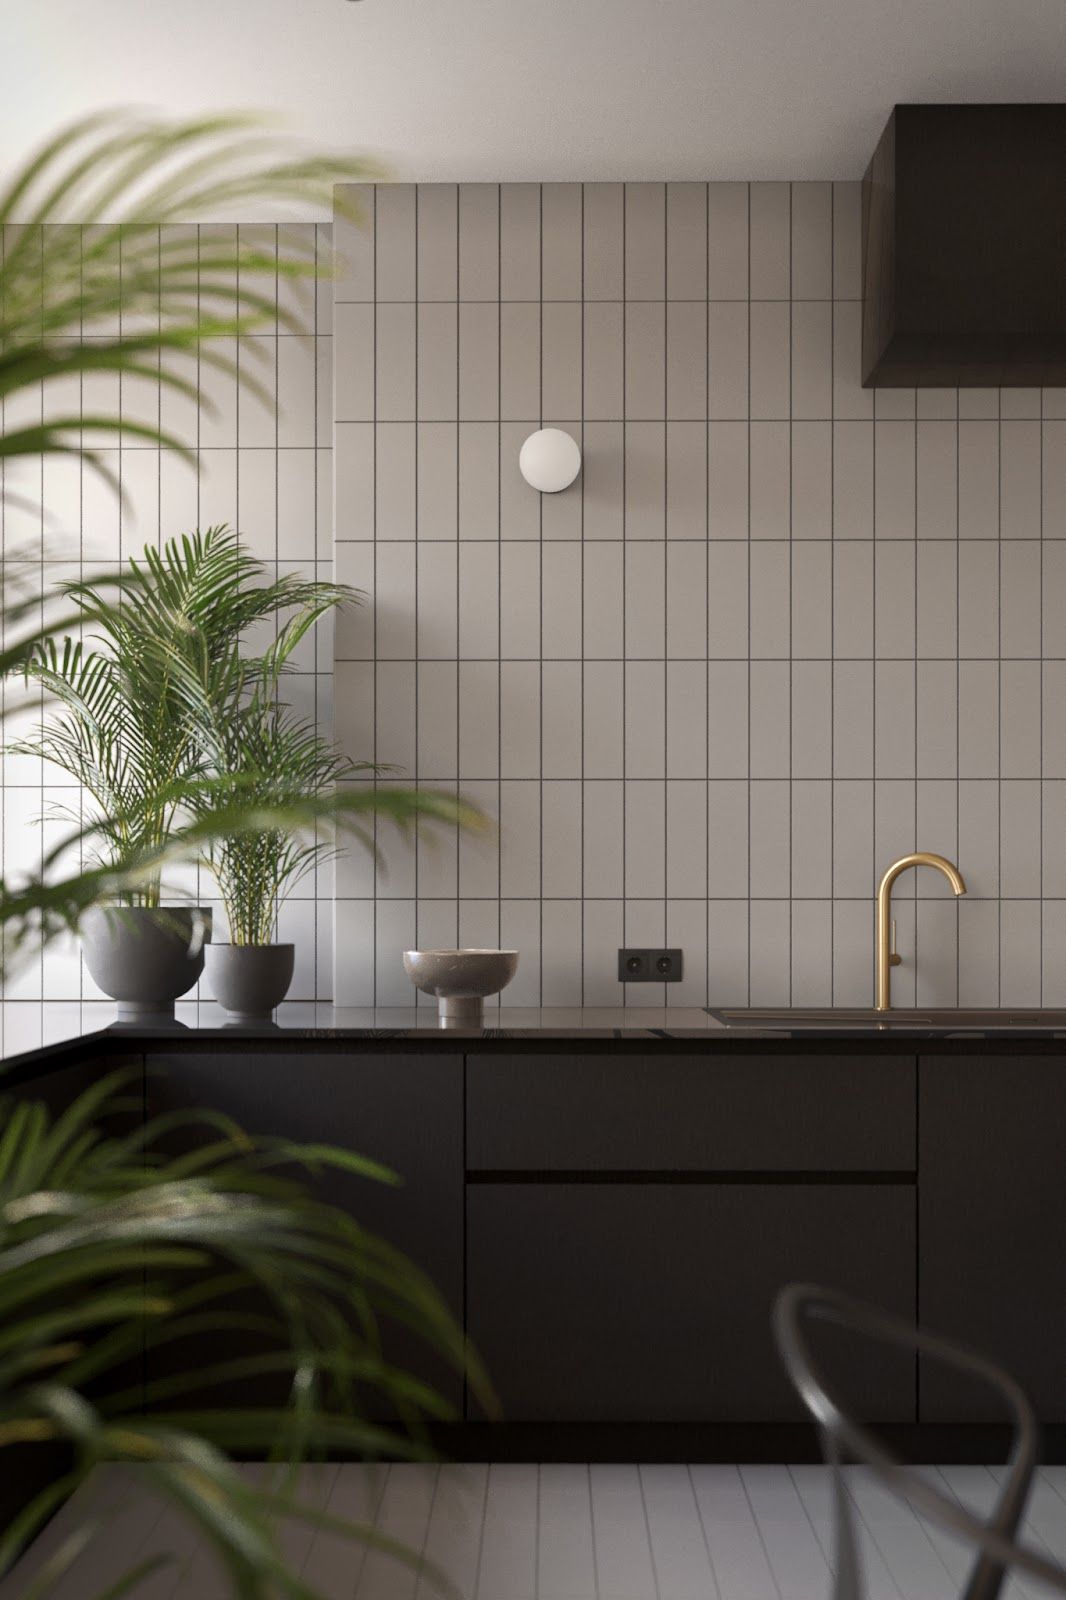
Last but not least here are the fresh and crispy interior shots:
I hope you enjoyed this article, see you next time!